| Front Page |  |
| Deployment | |
| Aesthetic | |
| Refurbishing | |
| Connecting | |
| Communicating | |
| Manuals | |
| Rentals | |
| Supplies | |
| About Aetheric |
Restoring a Teletype Model 15
The first printing telegraph was developed in 1841. By the 1870s, printing telegraphs, in the form of "stock tickers", were in use in financial centers. These Victorian-era machines printed letters on a long, narrow paper tape.
Our message machine uses a somewhat later design, the Teletype Model 15, introduced in 1930. This is the most reliable of the early teletype machines. About 200,000 units were built, and thousands still exist. The elaborate machinery was usually hidden inside an opaque case, and we are enclosing it in a brass and glass case to give it a Victorian look and to show off the complexity of the machine, with its many moving parts.
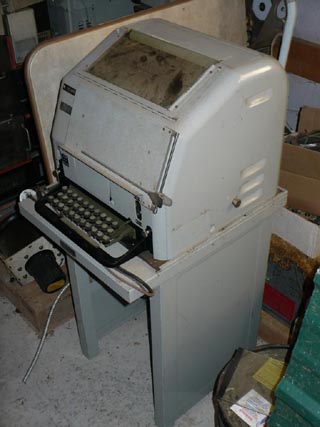 |
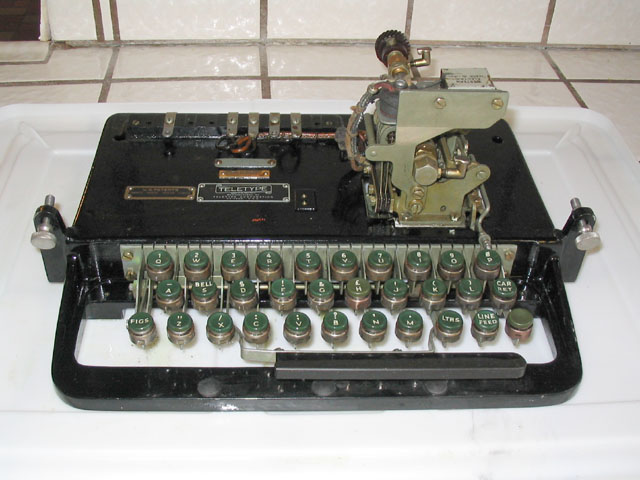
Model 15 Teletype, before refurbishment. The gray color indicates that this was a U.S. Navy unit. U. S. Army units are black, with extra nomenclature plates. Commercial units vary in color, with green being the standard. The case simply lifts off once the thumbscrews at left and right are removed. Several case variants exist, all of them severely functional. |
We started with this Model 15 Teletype. This particular unit was produced in the 1940s, and was undamaged but dirty. Congealed lubricants had jammed key parts of the mechanism, and it was not functioning. So the first step was a thorough cleaning.
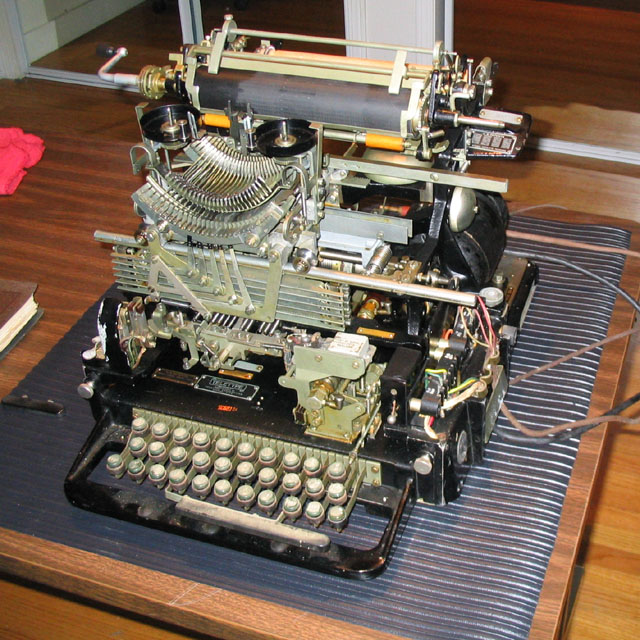 |
| Model 15 Teletype, before refurbishment. |
The mechanism was in good shape and the motor would run, but the keyboard was quite dirty and parts moved sluggishly. The unit disassembles easily into three main units; the base, the keyboard, and the typing unit, simply by removing some thumbscrews. The electrical connections between the units are all made with sliding contacts; there are no wires to disconnect. The motor can also be removed from the base unit. The next step was a thorough cleaning of each of those units.
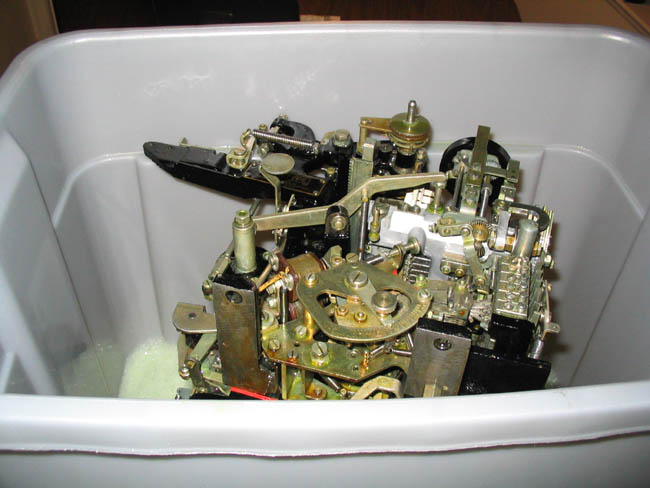 |
| The typing unit getting a bath |
Cleaning was done by soaking in Simple Green, a mild biodegradable nonflammable degreasing solvent. Others have suggested using kerosene, but Simple Green is a lower-risk fluid.
The typing unit was placed in a large Rubbermaid container, standing on its right end, so that the selector magnet, the only electrical component, was at the top. We tried not to get the selector magnet wet, but everything else could be immersed and was.
 |
| The three main units, drying after their baths |
The keyboard was the dirtiest component. It needed an overnight soak. This was done in a large, flat container, with the base part submerged but the upper part exposed. |
| Keyboard after its bath. Compare with the "before" picture. |
Some parts were wire-brushed by hand with a brass (not steel) wire brush. The sliding electrical contacts which connect base, keyboard, and typing unit were brushed until they showed untarnished surfaces. The keyboard and exterior surfaces were cleaned with Lemon Pledge.
Oiling
The next step was lubrication. A Teletype Model 15 has several hundred oiling points. The necessary manuals are available on line.
| Adjustments, Type Bar Page Printer, (Model 15) |
See pages 64-68 of the "Adjustments" manual for lubrication instructions. Proper lubrication of these machines is essential. Most of the machine motions are powered in one direction, but spring-loaded on return, and correct operation depends on the return motions taking place in the correct amount of time. Too viscous an oil, or oil which congealed, will slow down the mechanism and result in typing errors or the failure of some components to function at all.
For lubrication, on the recommendation of other Teletype Model 15 users, we used Valvoline 5-20W synthetic motor oil, available by the pint at larger auto supply outlets. This synthetic oil should not congeal over time, unlike many alternative lubricants. The points that needed grease (the large gears and the big sliding contact rails) were treated with white lithium grease. All oil fill points were filled. The main shaft, which contains a felt oil wick, was oiled per the manual, by removing the end cap at the right end, tilting the entire machine to the left, and putting in oil until oil ran out the left end of the shaft.
Many of the oiling points, such as the ends of springs and the hundreds of pivots in the keyboard and typebar sections, only need a drop or two of oil each. These points can be lubricated quickly with the right tool for the job.
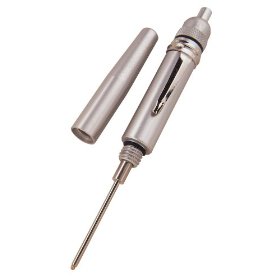 |
Empire Level Precision Oiler This useful little device releases one drop of oil each time the button is pressed. Notice it sitting to the right of the Teletype in the picture below. |
Finally, we have the unit reassembled, powered, and ready for testing.
 |
| Model 15 Teletype, after refurbishment. |
Wiring
This unit came with the original wiring; two long-frame switchboard plugs for the keyboard and typing unit, and a 4-wire power cord (120VAC, frame ground, and DC ground). The power plug was replaced with a modern 3-prong plug in "rubber" style, in keeping with the rest of the machine. The telephone plugs were left untouched, and long-frame jacks were obtained to mate with them.
The wiring in these machines is General Electric Deltabeston wire, with asbestos insulation embedded in a felt base and wrapped with woven cotton or silk. "The asbestos insulation does not deteriorate with age, nor does it break down with heat" (General Electric, 1921). To avoid asbestos hazards, we left the wiring alone.
These units are designed for a 60mA current loop. The selector magnet contains two coils, with a 90 ohm resistance each. They are usually wired in parallel, and the measured resistance at the telephone plug to the typing unit was 55 ohms, as expected. Applying 4V or so to the selector magnet will pull in the magnet, and this is a good basic test.
But the unit won't run on 4V. The selector magnet has a huge inductance (4 Henries), and the rise time for inrush after turn-on is too long unless a much higher voltage is used. These machines are usually run from a 120V or 130V DC supply through a 2K 10W resistor to limit the current to 60mA. We used a regulated 120VDC 200mA supply and a 2K 10W resistor. Note that the 10W resistor will get quite hot.
For reference, a schematic diagram of the unit is provided. This is typical of Model 15 units, but not definitive; there are considerable variations.
 |
The usual external connections are
| Circuit | Terminals | Voltage | Notes |
|---|---|---|---|
| Power | 21, 23 | 120 VAC for synchronous motor | 120VAC, about 3 amps. |
| Transmit (keyboard) | 32, 34 | Contacts, normally run at 120VDC 60mA | Should measure nearly zero ohms, opening to infinity when break key is operated. Wire the keyboard and printer in series with a 120VDC supply and a 2K 10W resistor to limit the current and you have a big typewriter. |
| Receive (printer) | 41, 42 or |
120VDC, current-limited to 60mA | Connections may vary. Should measure 55 ohms across the receive terminals if unit is wired for 60mA operation and no line relay is installed. Applying a 9V battery briefly to these terminals should pull in the selector magnet. |
Testing and adjustment
The unit was connected to the 120VDC power supply through a 2K resistor, as above, with the keyboard and typing unit connected in series. This makes the unit operate as a big typewriter. We put in paper and a ribbon. These machines use Underwood typewriter ribbons, Nukote B76, available from Amazon.com.
Initially, typing was totally wrong. The wrong typebars were selected, and many key functions didn't work. As a test, we hand-cranked the motor through a typing cycle. With the keyboard connected to the printer and running from the same motor, it's possible to type very slowly while hand cranking the motor. This made it clear that the keyboard was dropping one bit. Keyboard encoding, from 32 keys to five bits, is entirely mechanical. The keyboard has a separate electrical contact for each of the five bits, all in parallel and driven by cams at the appropriate bit time. We used a contact burnishing tool to clean the keyboard contacts, after which the bit patterns generated were reasonable.
Typing was still unreliable. We noticed that the selector magnet lever was brushing the cam which forces it into either the upper or lower position on each bit cycle. When we moved it up and down with a finger, we could feel it touching something. That's not supposed to happen; it's supposed to just barely clear. The manual says the clearance should be 0.001" +- 0.0005. So it shouldn't touch, but a thin strand of wire shouldn't be able to fit in the gap. We (nervously) made the adjustment, after which the selector magnet moved freely.
At this point, the machine was typing about 90% accurately. After running it for a while, giving the oil a chance to move to the right spots, accuracy passed 98%.
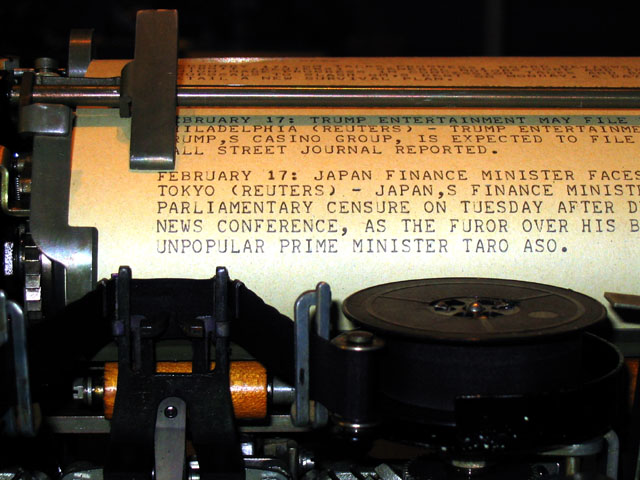 |
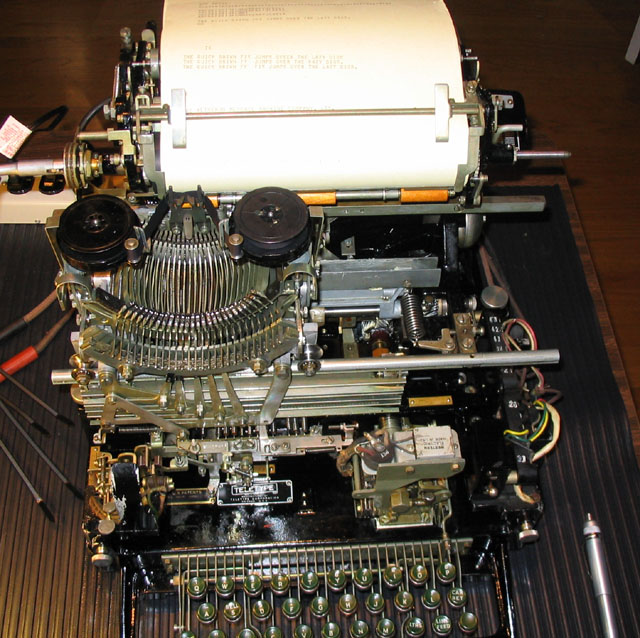
| Typing from a Reuters RSS feed |
Finally, running from computer signals and after an hour of operation, all typing unit errors disappeared and the typing unit performed perfectly. After further contact burnishing, the keyboard also worked without error.
Conclusion
This machine had clearly been retired in good operating condition. The only problems came from long term storage.
While others have suggested more aggressive cleaning and oiling, including removing the electrical parts and submerging the entire unit in kerosene, we had good results with much milder solvents.
Oiling per the manual, rather than spraying lubricant all over, is the way to go. With the right tools for the job, it's not difficult.
Completed and operating (video) The machine in its final state, in full operation. This machine was shown at the Nova Albion Steampunk Convention in 2011. |
February 19, 2018